Centos6.3下Apache配置基于加密的认证https加密证书访问
这里简单演示一下Apache下基于加密的认证访问----https加密方式访问。
1.DNS解析解析情况:
[root@localhost html]# nslookup www.jb51.net
Server: 192.168.2.115
Address: 192.168.2.115#53
Name: www.jb51.net
Address: 192.168.2.115
2.安装Apache SSL支持模块:# yum install -y mod_ssl (默认yum安装httpd是没有安装该模块的,安装后自动生产/etc/httpd/conf.d/ssl.conf文件)并生成证书。
[root@localhost certs]# pwd
/etc/pki/tls/certs
[root@localhost certs]# ls
ca-bundle.crt index.html localhost.crt Makefile
ca-bundle.trust.crt localhost1.crt make-dummy-cert
[root@localhost certs]# openssl req -utf8 -new -key ../private/localhost.key -x509 -days 3650 -out abc_com.crt
You are about to be asked to enter information that will be incorporated
into your certificate request.
What you are about to enter is what is called a Distinguished Name or a DN.
There are quite a few fields but you can leave some blank
For some fields there will be a default value,
If you enter '.', the field will be left blank.
-----
Country Name (2 letter code) [XX]:CN
State or Province Name (full name) []:510510
Locality Name (eg, city) [Default City]:GZ
Organization Name (eg, company) [Default Company Ltd]:ABC.COM
Organizational Unit Name (eg, section) []:Mr.Zhang
Common Name (eg, your name or your server's hostname) []:www.jb51.net
Email Address []:root@abc.com
[root@localhost certs]#
3.配置Apache,基本配置这里不多说了,下面是配置www.jb51.net站点http访问的情况。
[root@localhost html]# tail -n 8 /etc/httpd/conf/httpd.conf
NameVirtualhost 192.168.2.115:80
ServerAdmin webmaster@dummy-host.example.com
DocumentRoot /var/www/html
ServerName www.jb51.net
ErrorLog logs/dummy-host.example.com-error_log
CustomLog logs/dummy-host.example.com-access_log common
[root@localhost html]# tail /var/www/html/index.html
www.jb51.net
[root@localhost html]#
4.配置Apache支持https访问www.jb51.net站点,编辑 vim /etc/httpd/conf.d/ssl.conf 文件,制定www.jb51.net站点https访问时的相关信息。添加下面配置。
DocumentRoot "/var/www/html/www.jb51.net" #//为了显示效果,这里的站点目录不一样,一般情况一个域名应该指向同一目录的。
ServerName www.jb51.net:443
ErrorLog logs/ssl_error_log
TransferLog logs/ssl_access_log
LogLevel warn
SSLEngine on
SSLProtocol all -SSLv2
SSLCipherSuite ALL:!ADH:!EXPORT:!SSLv2:RC4+RSA:+HIGH:+MEDIUM:+LOW
SSLCertificateFile /etc/pki/tls/certs/abc_com.crt
SSLCertificateKeyFile /etc/pki/tls/private/localhost.key
SSLOptions +StdEnvVars
SSLOptions +StdEnvVars
SetEnvIf User-Agent ".*MSIE.*" \
nokeepalive ssl-unclean-shutdown \
downgrade-1.0 force-response-1.0
CustomLog logs/ssl_request_log \
"%t %h %{SSL_PROTOCOL}x %{SSL_CIPHER}x \"%r\" %b"
5.重启Apache服务,测试访问。

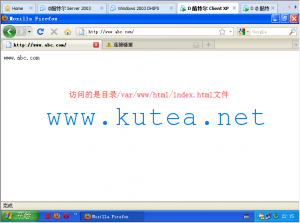
测试http访问的结果

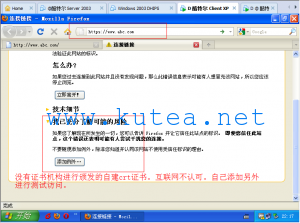
测试https访问的结果

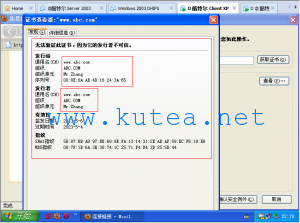
查看证书信息和自建crt信息一致

https访问的最终结果
本文由主机测评网发布,不代表主机测评网立场,转载联系作者并注明出处:https://zhujiwo.jb51.net/centos/1586.html

